Boss enemies like ARC Raiders Coins the Queen offer more health, less disruptive abilities, and easier damage windows than the Matriarch-making her the preferred target.
The key is killing early, which triggers respawn cycles and maximizes encounters.
Objective-Specific Trial Strategies
Leapers & Ground-Based Enemy Trials
Map: Damn Battlegrounds
Split your squad into three roles:
One player rotates between Leaper and Bombarder spawn clusters.
One player handles the secondary Leaper spawn.
One player focuses on Bastions.
Use adrenaline stims to maintain pace. Once a spawn appears, eliminate it instantly to start the next timer. This synchronized routing is the backbone of high-score runs.
Hidden Bunker
Map: Spaceport (during early-morning rotations)
Activate all four satellites before descending into the bunker. Inside, interact with all eight computers to reach the 6,400-point cap. Stay close during downloads-moving away cancels progress. Clean timing is everything.
First Wave Husks
Maps: Spaceport or Damn Battlegrounds
Modifier: Electromagnetic Storm
Use tools like Metaphorge to locate clusters. Splitting your team across high-density areas dramatically speeds clearing and point generation.
Damage Snitches
Maps: Spaceport, Buried City
Best Weapons: Renegade, Hole Cracker
This trial is best done solo. Loop repeatedly through hotspots like the hospital, library, and parking garage. Use your Renegade for standard mobs and Hole Cracker for shielded targets. Consistency is more important than raw firepower.
Harvesting Trials
Maps: Damn Battlegrounds (Hydroponic), Spaceport
Farm moss, mushrooms, and mullen by routing through high-density zones. Avoid high PvP zones when possible. Top players regularly break 45,000+ points with optimized loops.
Prospecting Probes
Map: Spaceport during Electromagnetic Storm
Vertical mobility is mandatory. Bring:
Zip lines
Snap hooks
Adrenaline stims
Spread out to cover as much ground as possible while maintaining rescue range.
Flying Enemy Trials
Map: Hidden Bunker
The North Trench Tower offers safe, isolated sightlines. Set up barricades and mines, then repeatedly scan and snipe with high-damage weapons. Positioning is the entire strategy here.
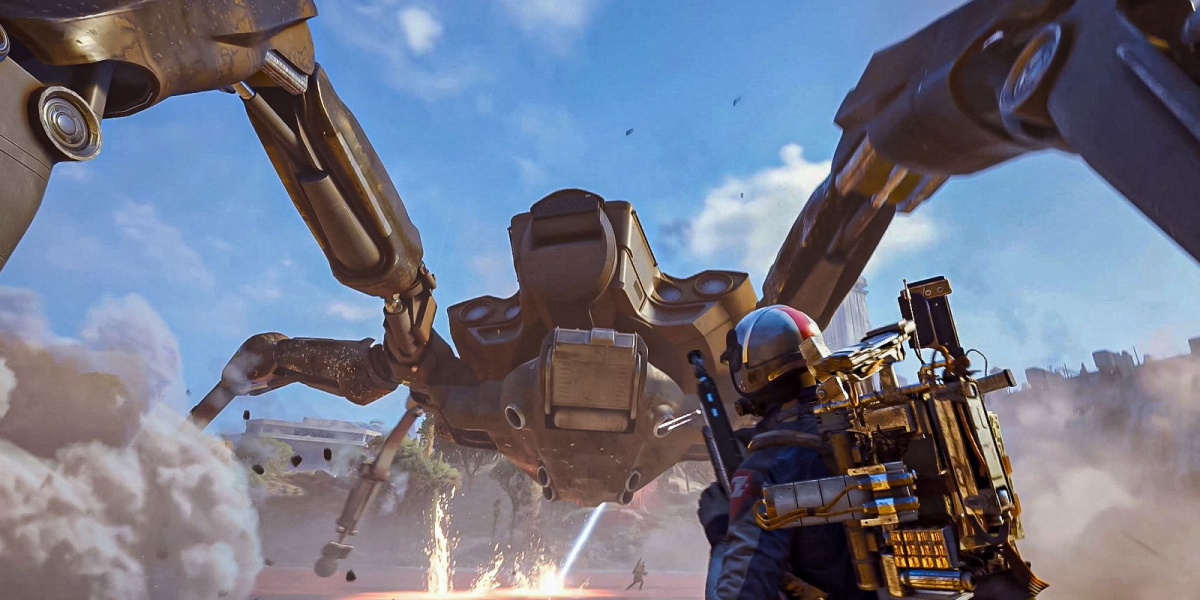
Boss Damage Trials (Queen & Matriarch)
The Queen is preferred:
Higher health
More manageable movement
Smoother damage phases
Aim for legs and armor plates, not the central cavity. This produces more serious shielded damage. With high-tier ARC Raiders Items and perfect execution, teams can reach up to 16,000 damage points per run.
Team Composition & Loadout Essentials
Successful squads bring:
Renegade, Hole Cracker, Wolf Packs
Lure & blaze grenades
Mines, barricades, and stims
Defined roles (spawn control, DPS anchor, support)
Every run must be a fully optimized attempt-there's no room for half-effort.
Advanced Tips & High-Level Tricks
Always pick 2× multipliers over daily modifiers.
Start spawn timers early with aggressive opening kills.
Use rooftops and vertical routes for fast rotations.
Plan extraction before you even begin.
Don't linger in buy ARC Raiders Coins PvP hotspots.