Printing Form 1099 in QuickBooks can feel overwhelming if you’ve never done it before. However, QuickBooks simplifies the process for small business owners and accountants. Whether you want to print Form 1099 in QuickBooks on your desktop or follow the online process, this guide will provide a complete walkthrough.
Why Printing Form 1099 Is Important
Form 1099 is crucial for reporting payments made to independent contractors and vendors to the IRS. Incorrect filing can lead to penalties, making it essential to understand how to print Form 1099 in QuickBooks accurately. QuickBooks provides a user-friendly platform to manage all your contractor payments and prepare forms effortlessly.
Step-by-Step Guide to Print Form 1099 in QuickBooks
Follow these steps to ensure a smooth process:
1. Prepare Your QuickBooks Data
Before printing, make sure all vendor payments are accurate.
- Update vendor information including name, address, and Tax ID
- Verify that payments meet the IRS threshold for Form 1099 reporting
- Reconcile all accounts to avoid errors during printing
2. Enable 1099 Tracking
To track payments correctly:
- Go to Edit > Preferences > Tax: 1099
- Click Company Preferences
- Select Yes to track payments for 1099
- Map each account used for contractor payments
3. Use the 1099 Wizard
QuickBooks has a built-in wizard to streamline the print Form 1099 in QuickBooks process:
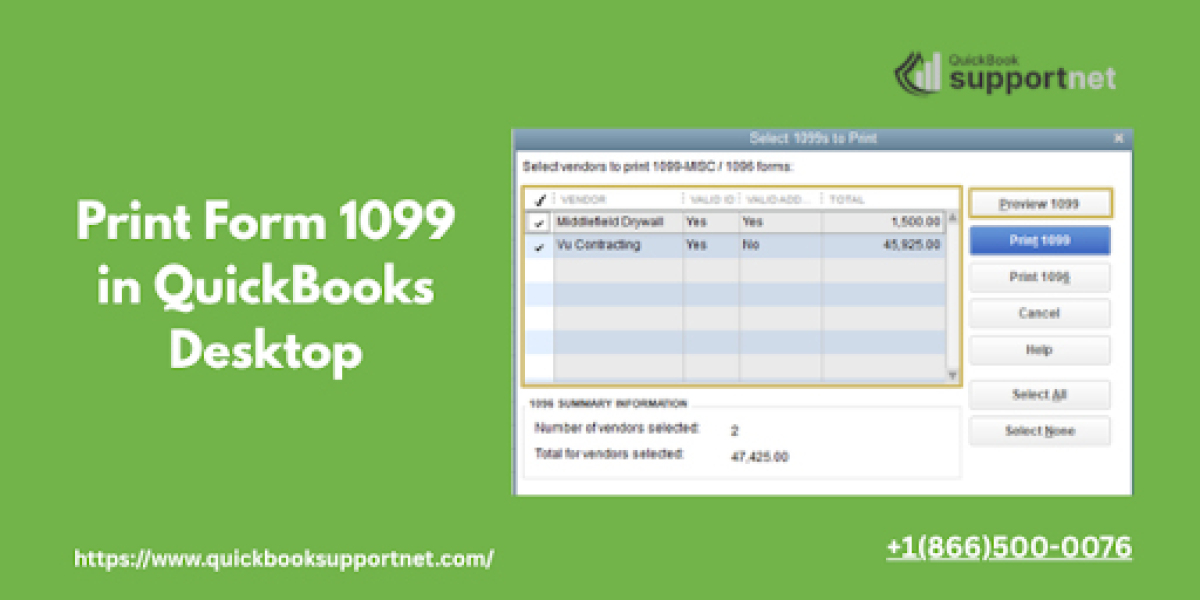
- Navigate to Vendors > Print/E-file 1099s
- Select the tax year
- Review vendor payment data
- Adjust any discrepancies before final printing
4. Print Form 1099 in QuickBooks Desktop
If using the desktop version:
- Open QuickBooks Desktop
- Go to File > Print Forms > 1099s
- Follow the on-screen prompts
- Load your pre-printed 1099 forms or select Print E-file Form
5. Download and Save for Records
After printing, always print form 1099 in QuickBooks desktop download for your records.
- Save digital copies for easy reference
- Double-check all forms before mailing or e-filing
Tips for Accurate 1099 Printing
- Double-check vendor information to avoid IRS rejection
- Use 1099-misc or 1099-NEC depending on payment type
- Print a sample form first to confirm alignment with pre-printed forms
- Keep deadlines in mind to avoid penalties
Common Mistakes to Avoid
- Incorrect Tax IDs or names
- Missing vendors who should receive 1099s
- Printing on blank paper instead of pre-printed forms
- Forgetting to update QuickBooks Desktop before printing
Conclusion
Printing 1099 forms in QuickBooks is straightforward when following the right steps. From setting up vendor information to using the built-in 1099 wizard and printing on desktop, QuickBooks ensures compliance and accuracy. For any challenges, call +1(866)500-0076 for expert support.
FAQs
Q1. Can I print Form 1099 for multiple vendors at once in QuickBooks?
Yes, QuickBooks allows batch printing to save time.
Q2. Is it possible to print 1099 forms for previous tax years?
Yes, QuickBooks supports printing for past tax years if data is available.
Q3. Do I need pre-printed 1099 forms to print from QuickBooks?
For desktop users, pre-printed forms are recommended, but e-filing can be done without them.
Q4. How do I fix misaligned forms when printing 1099s?
Check printer alignment and use the “Align Forms” option in QuickBooks before printing the final batch.
Q5. Can I download a copy of 1099 forms after printing?
Yes, QuickBooks allows you to save a digital copy for your records.
Read This Blog:- https://www.vevioz.com/read-blog/423818